pgAdmin4
References
About
pgAdmin4 is a graphical user interface to PostgreSQL.
Installation
To install pgdmin4, either use the menu:
- Services » pgadmin4 » Install
- Build
or the command line:
$ ./iotstack-menu.sh install pgadmin4
$ ./iotstack-menu.sh build
Local Image
The installation instructions at pgadmin4/container-deployment do work but are suboptimal. The IOTstack ethos is that containers should, to the maximum extent possible, work "out of the box", and should also be capable of re-initialising properly from a clean slate.
The specific issues are with the default deployment (at the time of writing):
-
The expectation that users necessarily understand the either significance of this instruction or the specific mechanics of putting it into action:
Warning: pgAdmin runs as the pgadmin user (UID: 5050) in the pgadmin group (GID: 5050) in the container. You must ensure that all files are readable, and where necessary (e.g. the working/session directory) writeable for this user on the host machine.
-
The Examples are inconsistent with respect to the internal path
/var/lib/pgadmin. The Dockerfile declares that path on aVOLUMEstatement. If it is not mapped (the first two examples) then the result is an anonymous volume mount. -
The third example has a volume mapping for the internal path
/pgadmin4/servers.json. In all likelihood, that is intended to be a file. However, if neither the external nor internal paths are present (the internal path doesn't exist in the image at the time of writing) then the structure is set up as a folder.
The implementation shipped with IOTstack solves these problems via the use of a Dockerfile plus a custom entry-point script. The theory of operation is:
- The
dpage/pgadmin4image is used as the base. -
The Dockerfile adds:
- rsync
- the custom entry-point script, and
- caches a copy of the
/pgadmin4directory.
-
The custom entry-point script:
- invokes
rsyncto repopulate the/pgadmin4directory from the cache. On first launch, this implies a full copy operation. On subsequent launches, it is a self-repair operation. - creates a placeholder file for
servers.json. - enforces correct ownership throughout
/pgadmin4; then - execs the original entry-point script.
- invokes
The original entry-point script completes normal setup and downgrades its privileges to run as (internal) user 5050.
Credentials
Two environment variables must be defined when the container launches
-
PGADMIN_DEFAULT_EMAIL. This must be a valid email address (ask me how I know). You can set it up like this:$ cd ~/IOTstack $ echo "PGADMIN_DEFAULT_EMAIL=user@your.home.arpa" >>.env -
PGADMIN_DEFAULT_PASSWORD. The IOTstack menu will generate a random value for this password if one does not exist already. You can either accept the random value or edit.env.
Please keep in mind that the values you define here only apply the first time you launch the PostgreSQL container. If you change any of these in PostgreSQL, you will have to make matching changes in pgAdmin4.
First run
To launch the container for the firs time:
$ cd ~/IOTstack
$ docker compose up -d pgadmin4
This will run the Dockerfile to produce the local image, then instantiate that image as the running container.
The container takes quite some time to get going (a minute or so on a Raspberry Pi 4). It is usually a good idea to monitor the container's log while waiting for it to become ready:
$ docker logs -f pgadmin4
You can terminate the log using control+c.
The next few instructions assume that you have selected the postgresql container from the IOTstack menu, and that that container is running.
Complete the following steps:
-
Use your web browser to connect to pgAdmin4 on port
5050. For example:http://raspberrypi.local:5050
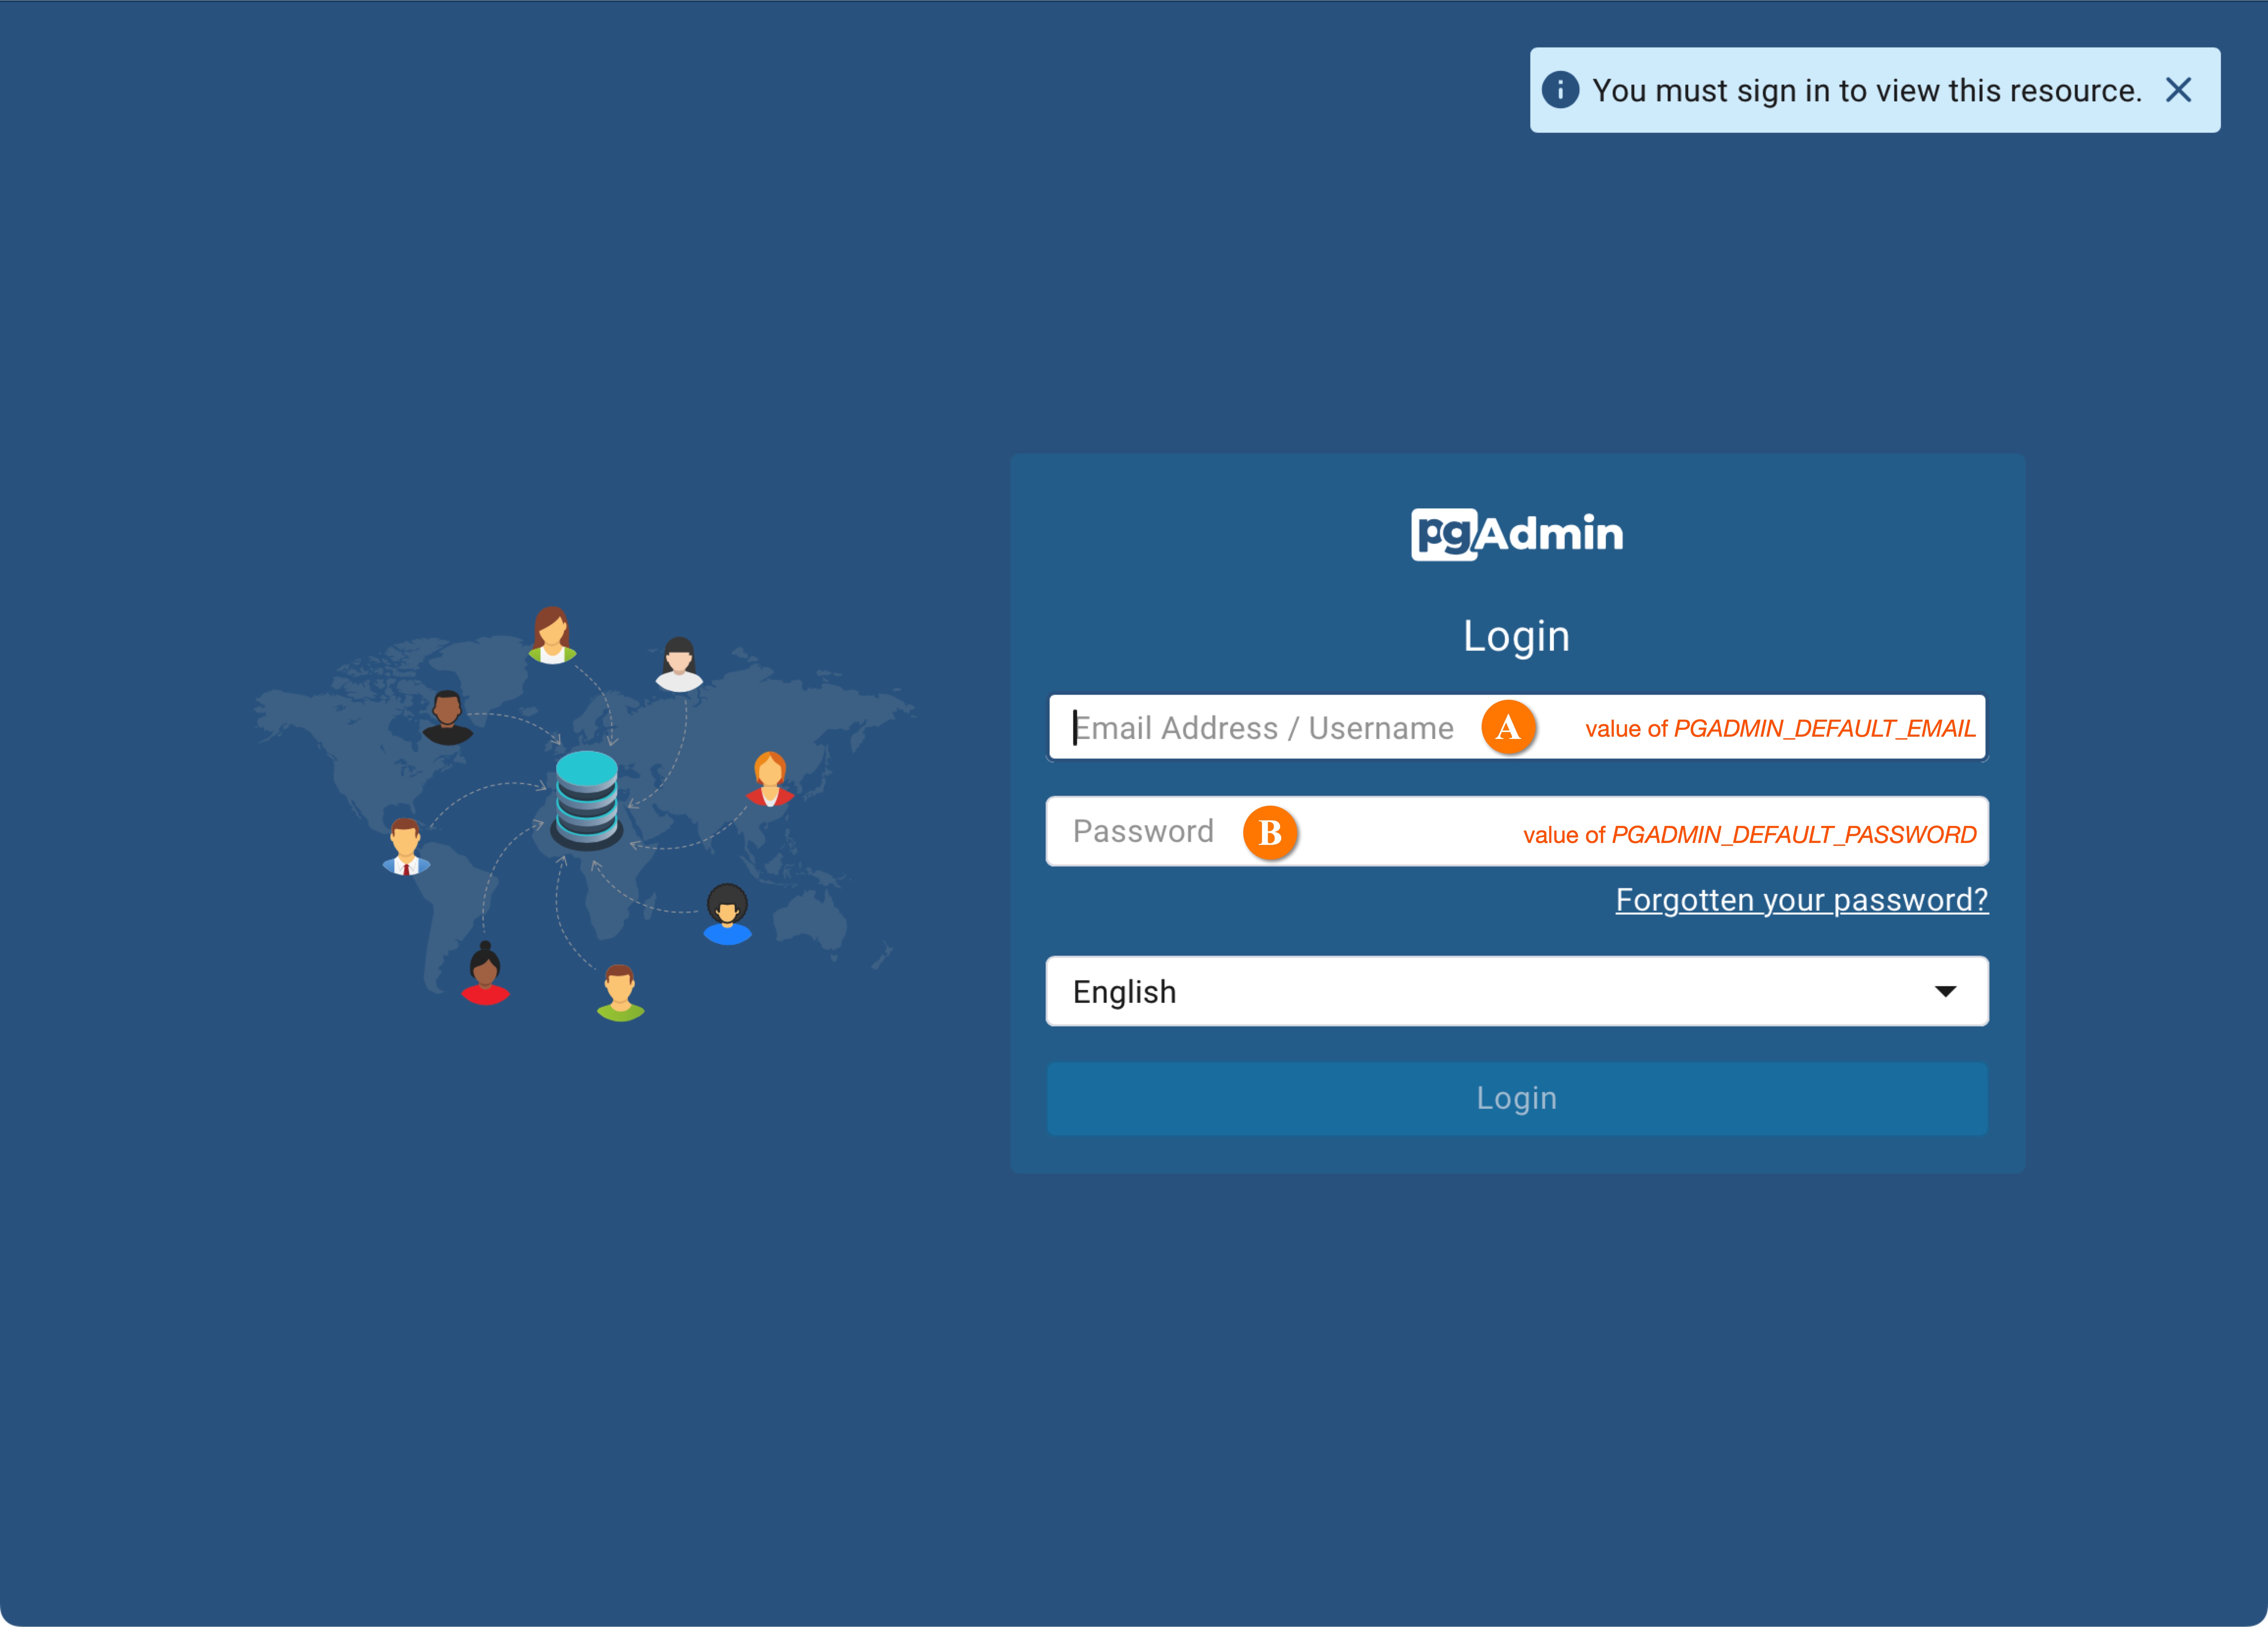
As noted above, the pgAdmin4 service takes a while to start so please be patient if you have only just launched the container. Once your browser is able to connect to pgAdmin4 successfully, you will be asked to enter a username and password:
-
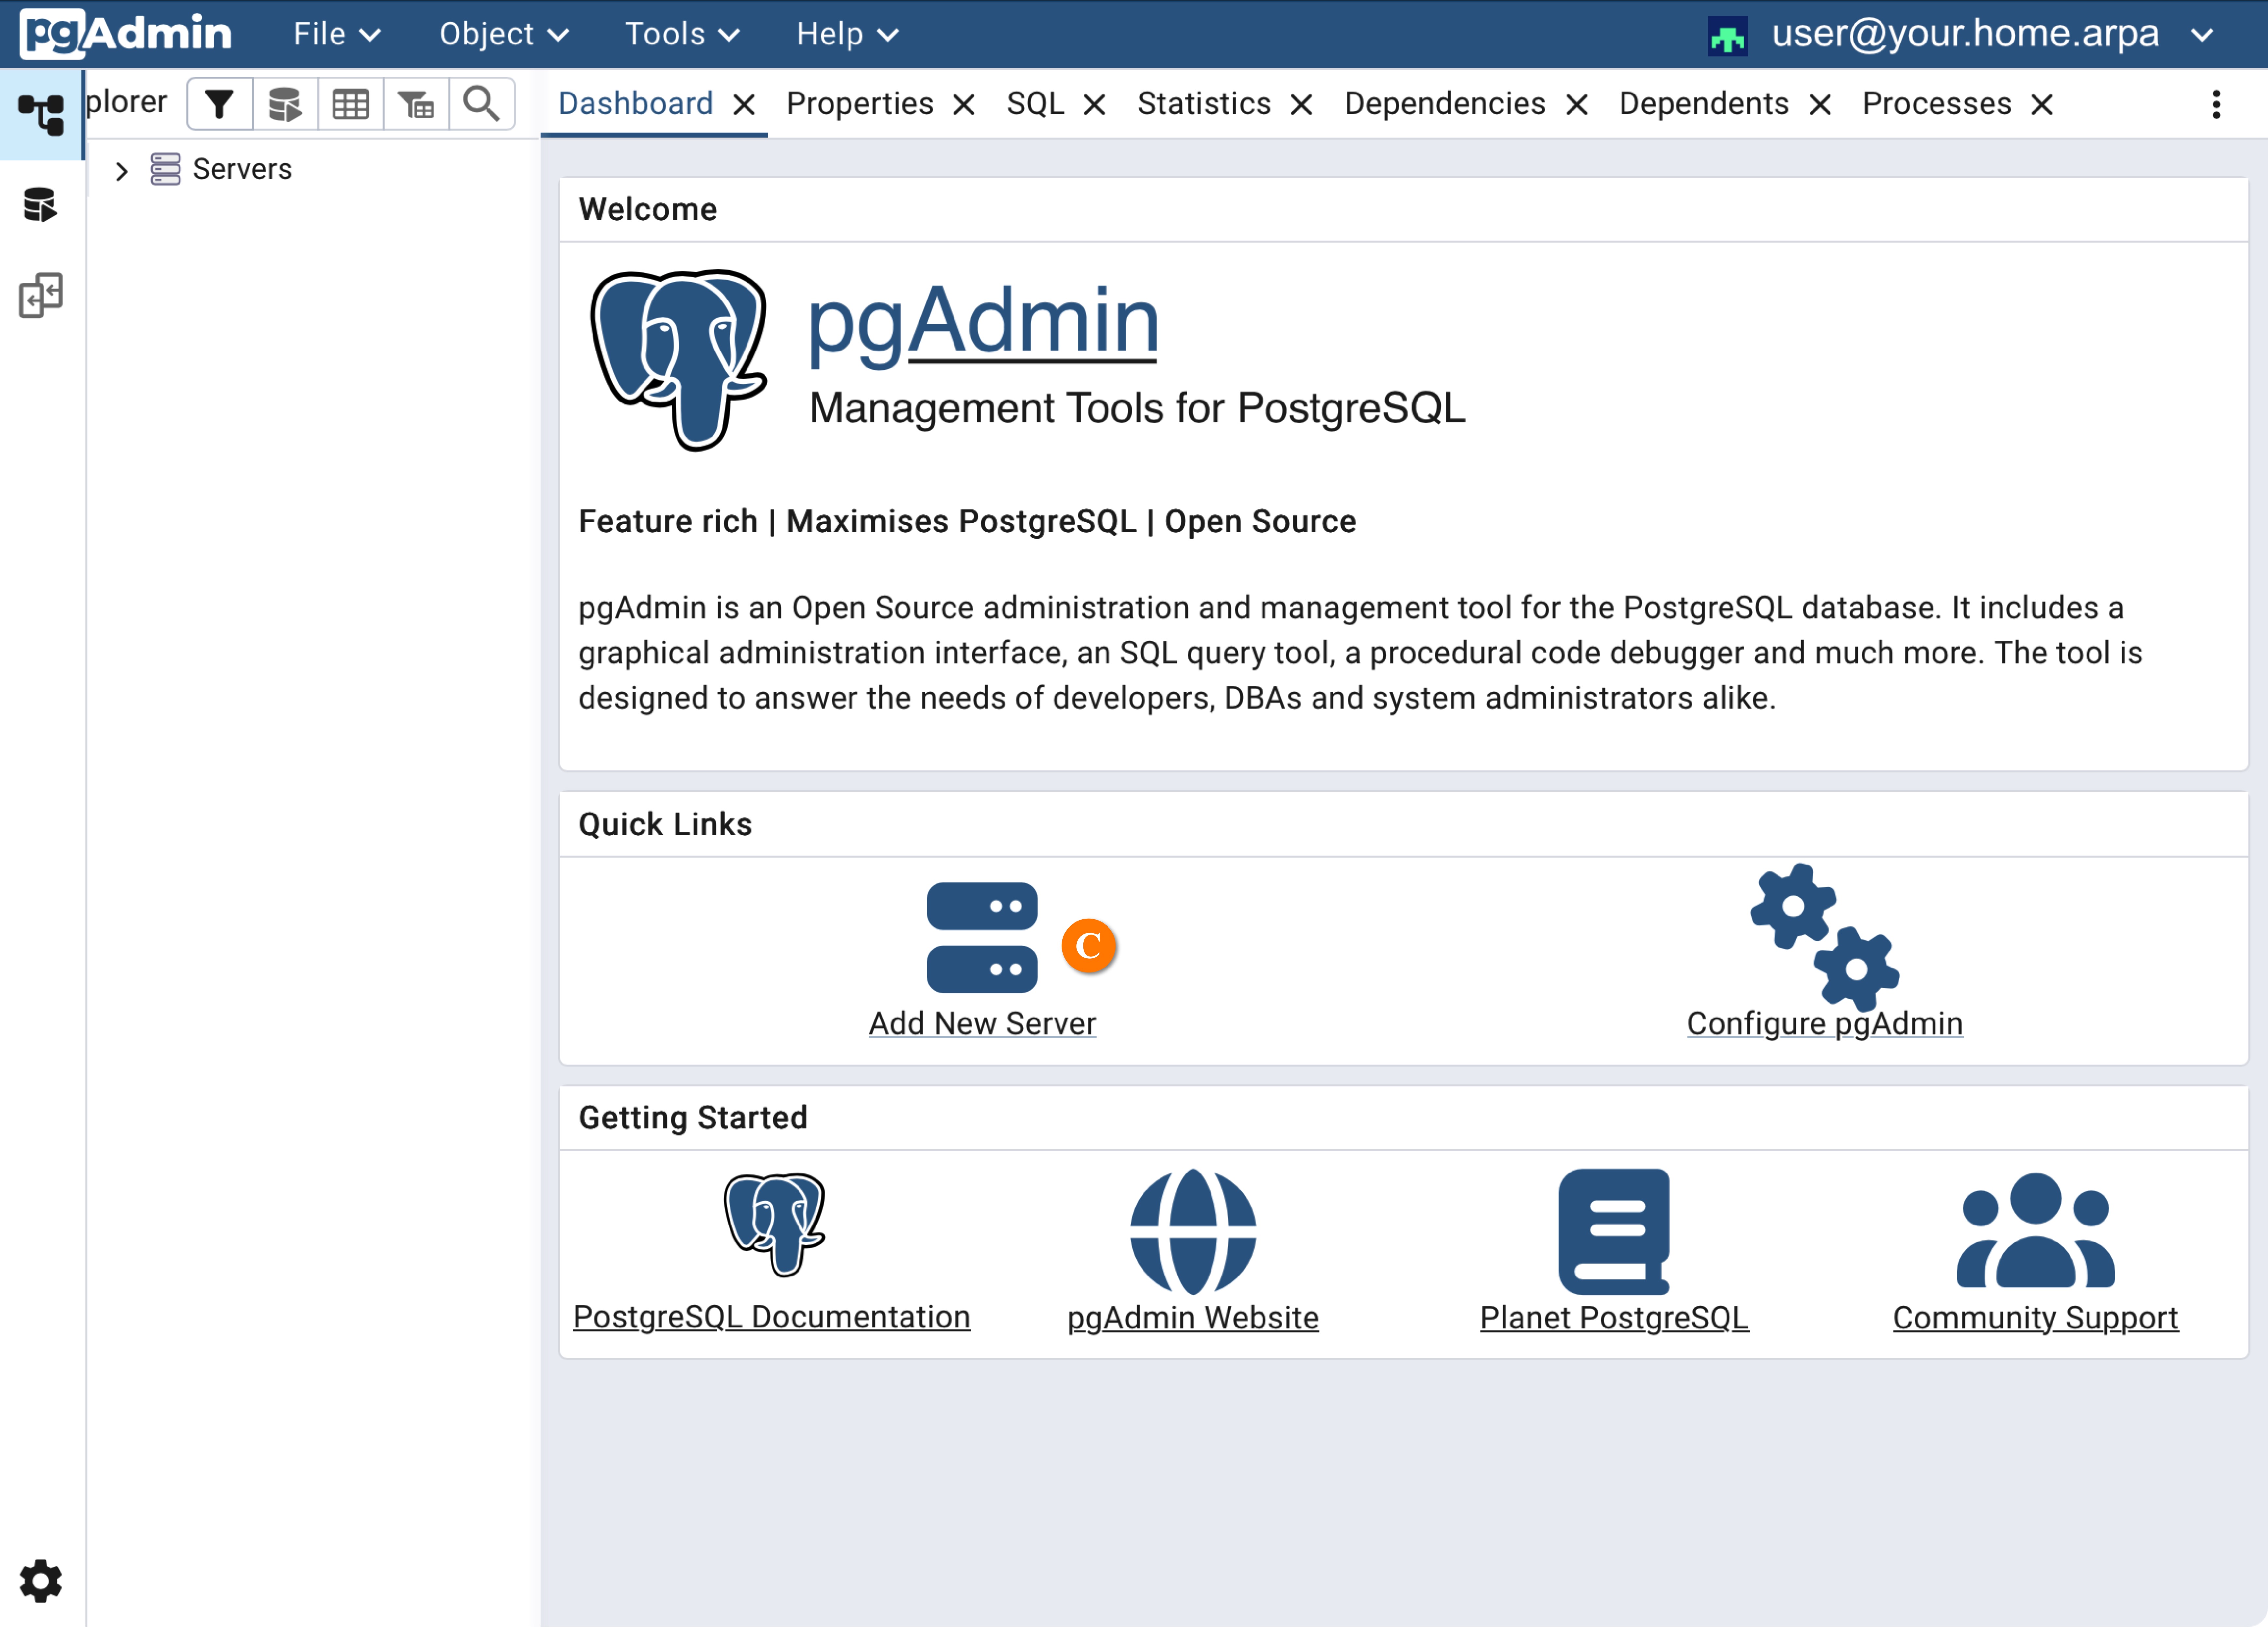
Enter the username 🅐 and password 🅑 credentials defined above. After login, the home screeen will be displayed:
-
Click "Add New Server" 🅒. This displays the server registration sheet, starting with the "General" tab:

-
Give the server a name at 🅓. The name is not important. It just needs to be meaningful to you.
-
Click the "Connection" tab 🅔 to display that screen:

-
Enter the name of the PostgreSQL container at 🅕 (ie "postgres").
-
The default port at 🅖 is 5432. This is the internal port number the PostgreSQL container is listening on. It is unlikely that you will need to change this.
-
In the "Maintenance database" field 🅗, enter the value of the
POSTGRES_DBenvironment variable as it applies to the PostgreSQL container (iepostdb). -
In the "Username" field 🅙, enter the value of the
POSTGRES_USERenvironment variable as it applies to the PostgreSQL container (iepostuser). -
In the "Password" field 🅚, enter the value of the
POSTGRES_PASSWORDenvironment variable as it applies to the PostgreSQL container. The menu will have auto-generated a random password into.envand you will know whether you edited the value. -
Enable the "Save password" switch 🅛 if you think that is appropriate.
-
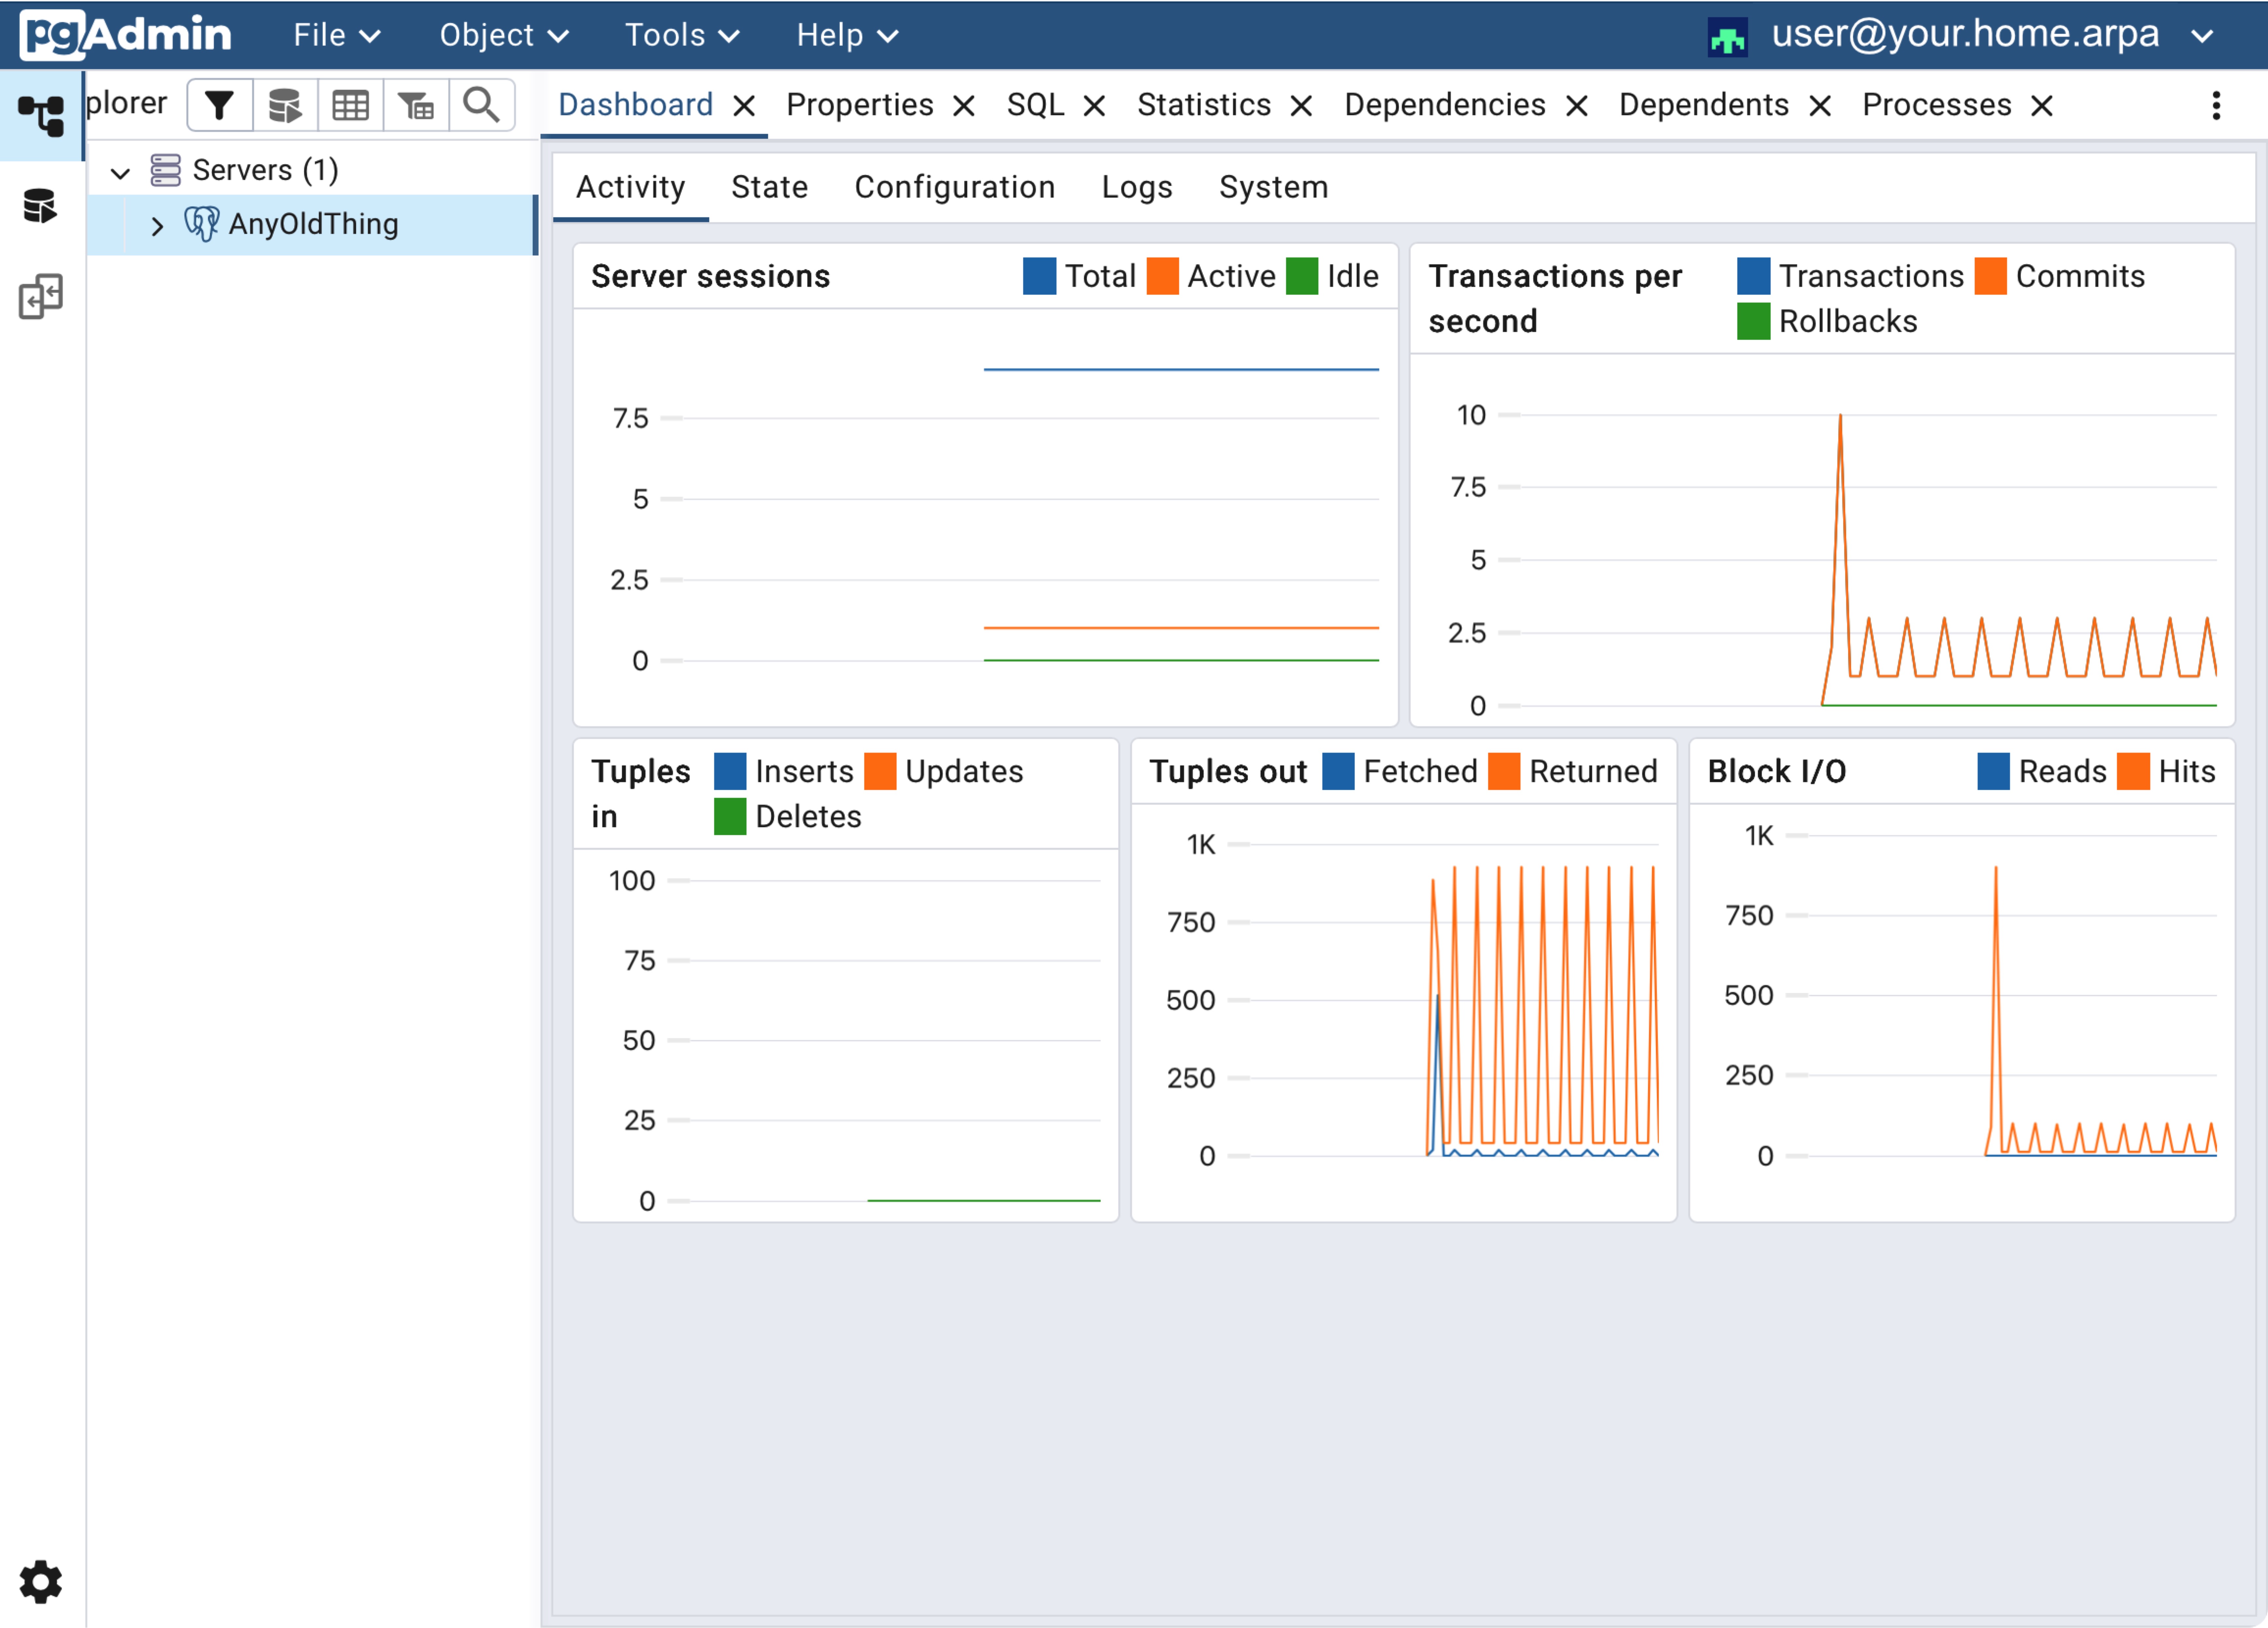
Click the "Save" button 🅜. If all goes well, you will be connected to the dashboard for the database:
Additional configuration
We recommend using an override file file to make configuration changes. You should create a file at the path:
~/IOTstack/services/pgadmin4/override.yml
environment variables
Here is an example setting some supported Environment Variables:
pgadmin4:
  environment:
    PGADMIN_CONFIG_ENHANCED_COOKIE_PROTECTION: True
    PGADMIN_CONFIG_CONSOLE_LOG_LEVEL: 10
Key point:
- Please note the use of "colon syntax" in the above example. The examples in the pgAdmin4 documentation all use "equals syntax". The only place where you can safely use "equals syntax" is in the
.envfile. You run the risk of confusingdocker composeif you do not use "colon syntax" in YAML files.
pinning to a version
You can also use an override file to pin to a specific version of pgAdmin4. For example:
pgadmin4:
  build:
    args:
      - DOCKERHUB_TAG=9.18.0
applying changes
To apply changes made using an override file:
$ cd ~/IOTstack
$ ./iotstack-menu.sh build
$ docker compose up -d pgadmin4
Container maintenance
Because pgadmin4 is instantiated from a local image, it requires special treatment whenever the base image is updated on DockerHub:
$ cd ~/IOTstack
$ docker compose build --no-cache --pull pgadmin4
$ docker compose up -d pgadmin4